
© 2023 Pashant Khandelwal

© 2023 Pashant Khandelwal
I grew up playing all the 90s games and I still love them. For quite a sometime I am now using VirtuaNES emulator to do retro gaming on my Windows machine. There are other NES emulators out there but this is the one I have been using now for a while and it has been good so far.
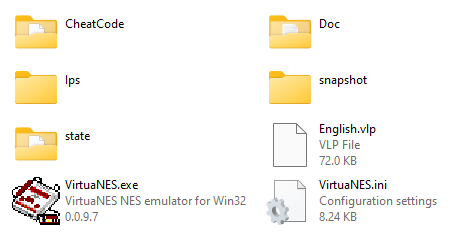
To setup VirtuaNES emulator on Windows, download it from here and here. Once you download the zip file, extract the content to any folder and double click the VirtuaNES.exe to run the emulator.
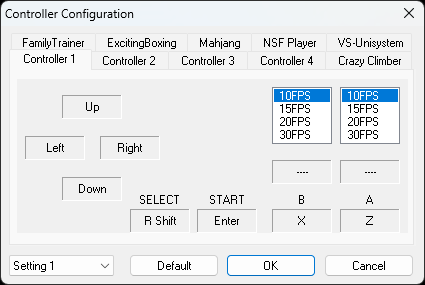
After the emulator is launched, we can start configuring the sound and controller. If you are a keyboard person, then no configuration is needed, you can instantly load a ROM and start playing the game. The default keys are as follows (yours might look a little different):
Go to Options -> Controller to change the keyboard bindings or your controller bindings.
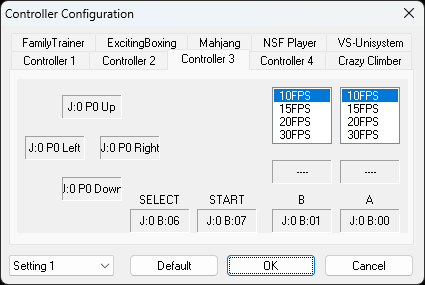
XBOX One controller is also compatible and you can configure it easily. Make sure to turn on or plug in the controller before you start the emulator.
Here is the screenshot of the bindings of my XBox One controller.
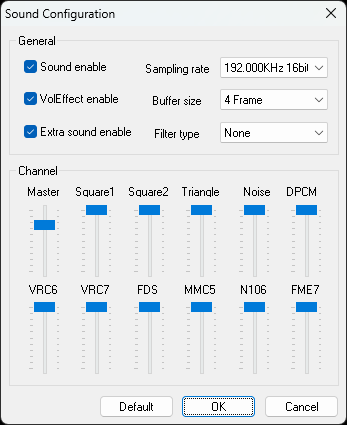
For configuring the sound settings, go to Options -> Sound
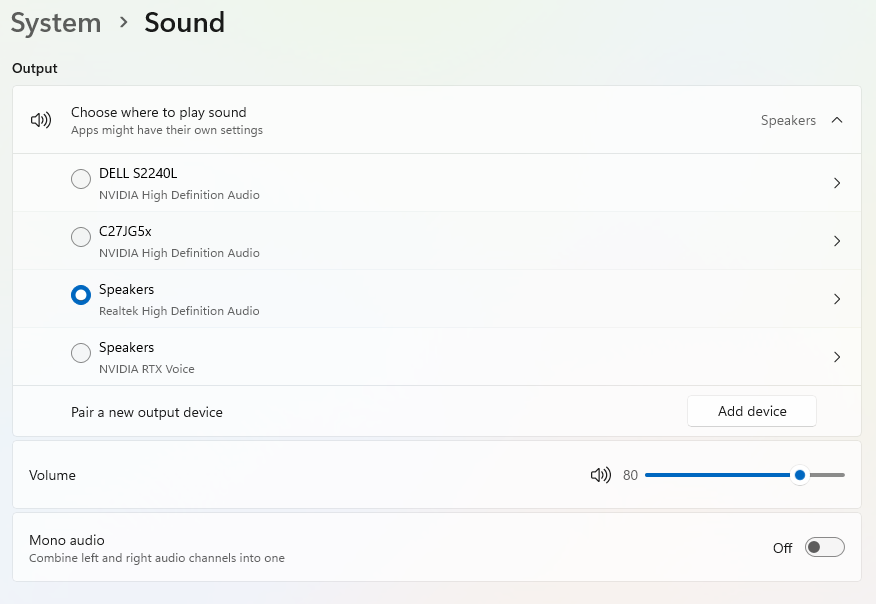
Even after setting up the sound, there is a chance that you can’t hear it when you play the game. That is due to a setting in the audio settings section in Windows. Refer the below screenshot and check whether the Mono audio is off or on. If it is off, then you have to turn it on and that will solve the sound problem in the emulator.
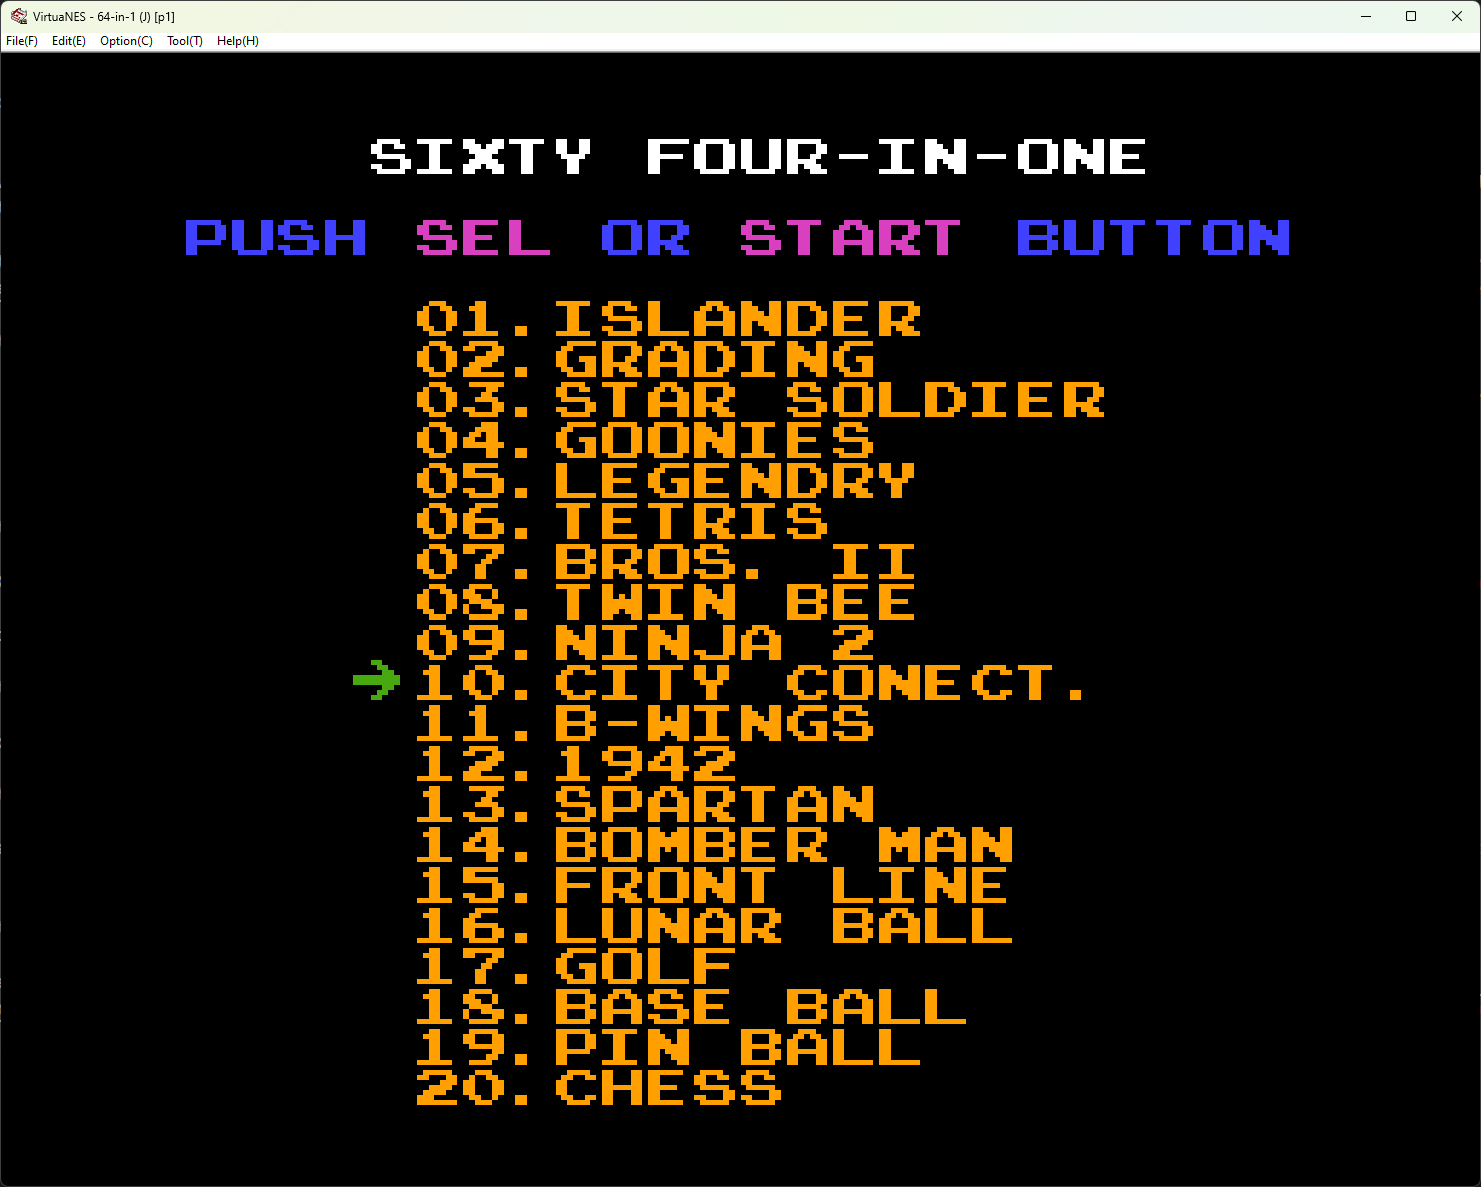
All set now!! Let’s get some games or ROMs as we call it and load it in the emulator. I downloaded few ROMs from Emulatorgames.net. Extract the zip file and load the ROM in the emulator by going to File -> Open. You should now see your childhood retro gaming console in front of you.
My team at Microsoft is responsible for building tools that enhance customer experience when you contact Microsoft support. Although our tools are never used by customers directly but they play an essential role in improving the experience and overall cost reductions. This means that our work is critical for the overall success and it should perform under variance of load, especially on holidays.
Team wants to test their application from different geographies and mark the metrics used.
I am not the primary team member leading the load testing project but it interests me a lot on how the other team is going to achieve this. Although they have a different plan to get this done, I came up with my own simple but useful way of getting these tests done via Azure Container Instances.
To accomplish this, I plan to use K6 load testing tool which is built specifically for engineering teams and by well-known Grafana Labs. I need to setup Azure Container Instances with K6 image and configure it with Azure File Share which acts as a volume mount.
I will start up by setting a Resource Group in Azure and I will name it cannon. You can name it anything you want.
I am using Azure CLI aka AZ CLI. If you have not setup AZ CLI for Azure, then I strongly suggest you do so. If you still choose not to use this, then you can still use Azure Portal, Terraform etc. to create these resources.
$ az group ceate --name cannon --location eastus
I need an Azure Storage account because File Share service is a part of Azure Storage.
The below command will create a new Azure Storage account inside the resource group cannon with Performance tier as Standard and Redundancy as Locally-redundant storage. You can change these values as per your need.
$ az storage account create --name geoloadteststore \
 --resource-group cannon \
 --location eastus \
 --sku Standard_LRS
The below command will create a new file share which I will use as a volume mount for my Azure Container Instance.
az storage share create \
--account-name geoloadteststore \
--name loadtestresults \
--quota 1
In the above command, account-name and name are mandatory, quota is a non-mandatory parameter, but I have used it to ensure that the share size is not set to default which is 5TB. Setting quota as 1 will set the size of my share to be 1GB.
When I create a new Azure Container Instance, it will use an image to create a container and run it. This means that I don’t have to run the container explicitly unless there is an error.
Here is an AZ command that will create a new Azure Container Instance and execute the load test using K6.
az container create -n k6demo \
--resource-group cannon \
--location eastus
--image grafana/k6:latest \
--azure-file-volume-account-name geoloadteststore \
--azure-file-volume-account-key RhGutivQKlz5llXx9gPxM/CP/dlXWLw5x6/SHyCl+GtLZeRp9cAYEByYTo3vL2EFAy0Nz0H+n1CV+AStTNGEmA== \
--azure-file-volume-share-name loadtestresults \
--azure-file-volume-mount-path /results \
--command-line "k6 run --duration 10s --vus 5 /results/tests/script_eastus.js --out json=/results/logs/test_results_eastus.json" \
--restart-policy Never
The above command has lots of details and few parts of it require some good attention. For most of the part, things are simple to understand. The image that I am using is provided to us by Grafana from their verified Docker Hub account. I then use the Azure File share information to setup the volume mount.
The important part here is the way the volume mount is used. The --azure-file-volume-mount-path has the value /results which will be a mount path in the container. This means that you don’t have to create a folder named results in the file share. If you take your attention to the next parameter --command-line, you can see that the K6 test script is being read from /result/tests folder and output of the command is stored in /results/logs. If you wish, you can also use a full path of a blob storage or even an S3 bucket to read your script file.
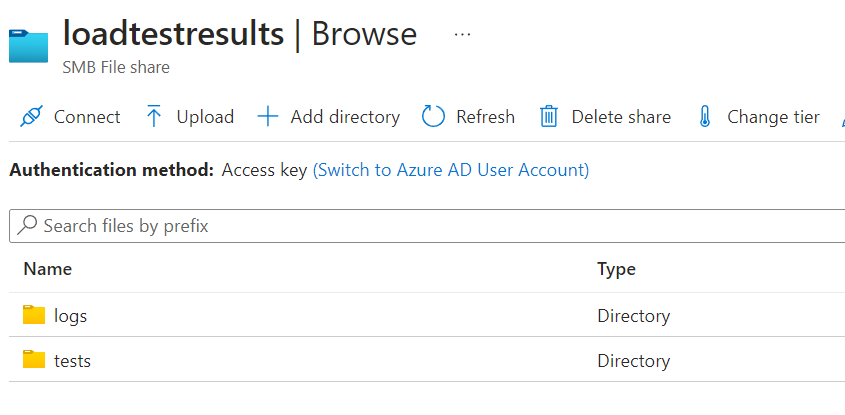
Navigate to the file share in Azure Portal and create 2 folders named logs and tests.
Inside the tests folder, add a K6 script file you have created. I have created multiple script files for different locations.
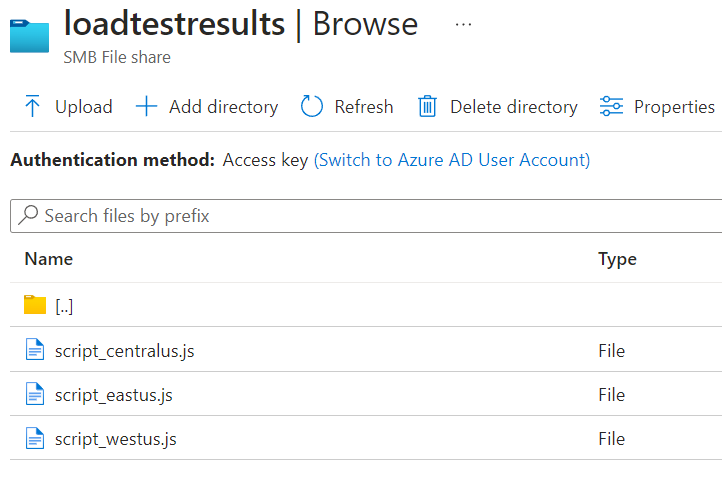
For this example, I am using a demo script with some changes to it. Note the change in the name of the summary file. It contains the location name for easy identification of logs.
import http from "k6/http";
import { sleep } from "k6";

export default function () {
  http.get("https://test.k6.io");
  sleep(1);
}

export function handleSummary(data) {
  return {
    "/results/logs/summary_eastus.json": JSON.stringify(data), //the default data object
  };
}
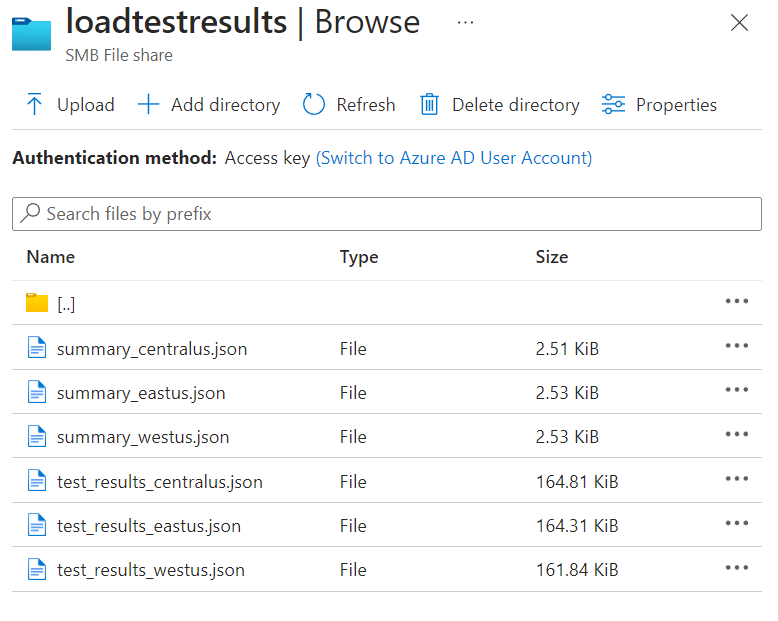
As per K6 documentation, I have added an additional function named handleSummary. This function will generate the summary for the entire test and save it in the JSON format which later I can use for visualization. This is the same output you will see when you run the K6 on your console. The other file which is referenced in the command above called test_results_eastus.json will have details about every test run.
I execute the az container create command three times for 3 different regions.
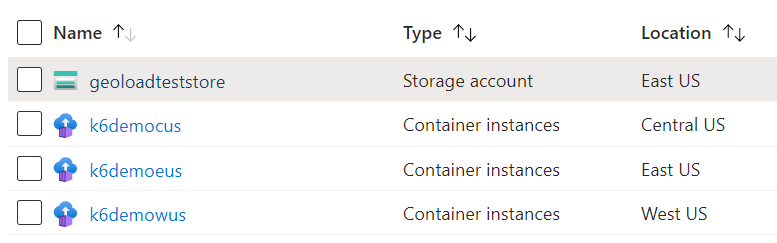
I have 3 Azure Container Instances which ran by K6 load test for 3 different locations. You can also see the location for each Azure Container Instance in the above screenshot. After the load test is finished, I can now view my JSON logs in the file share.
This way I can run the load test on my web apps or services hosted from anywhere or at least from all the Azure regions.
With the above working as expected, I think there are few things that I can really improve on.
The entire work is manual and is error prone. It will be good to automate this entire process with less user intervention when it comes to execution. Writing load tests would be user responsibility though. Going forward, I would like to automate the creation of all these resources using Terraform and then execute the TF scripts automatically. If you want to do this for any of your Terraforms projects, refer my article on medium.
After getting the test logs from the File Share, I also want to see what the load test results look like. As of now there is no tool I have to do so. But there are few I found on the GitHub that allow me to visualize the output of K6 load tests. Maybe I would write one or use an open-source, I am not sure about that at the moment.
I hope you enjoyed this article and learn one or more things related to Azure and K6. Here are few more resources that will be helpful.
Terraform is my go-to IAC tool for building my infrastructure in Azure. I usually use Azure DevOps pipeline to execute my terraform plan, but it would be nice to know if I can execute it programmatically or on request basis. Even on request basis you can trigger a CI/CD pipeline to provision the infrastructure but maybe it is too much for a simple project to have.
One of the biggest pain points has been the authentication in command line tooling. I can execute my terraform plan if I have az cli login done on the shell/terminal I am using. I can also perform the same operation programmatically, but it will still open up a web browser and ask me for authentication. I don’t want user intervention when performing this operation. So, the way I can achieve this is by using Service Principal.
You can also make use of Managed Service Identity or MSI but not all Azure resources support this. You can check the list of the resources here.
The service principal I am planning to use will let me create any Azure resource. This is equivalent to az login cli command.
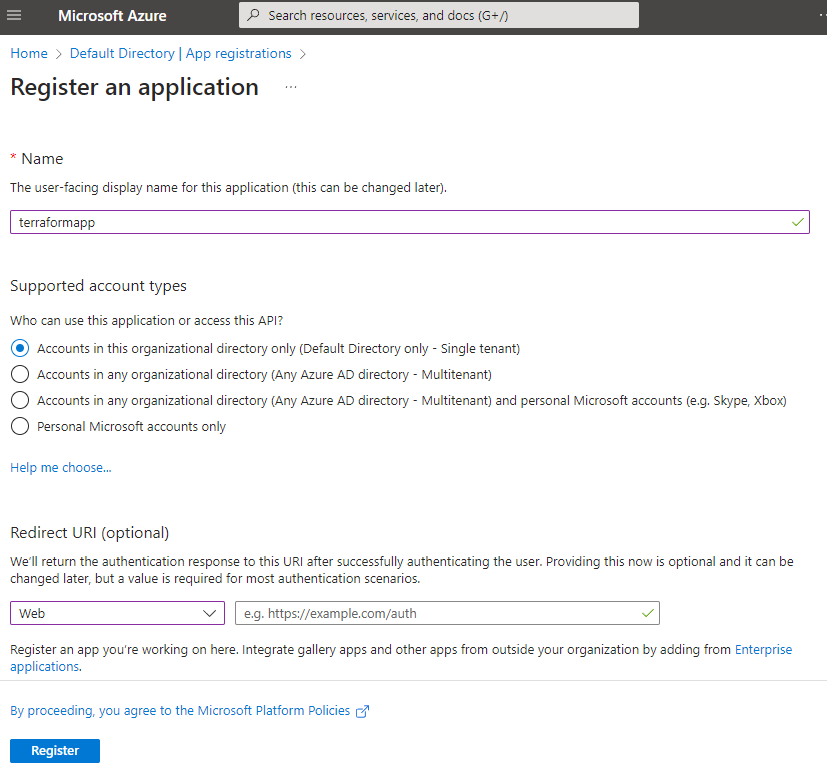
Add a new App registration in Azure Active Directory. Give a name to your application and then select Redirect URI to be web and URL can be left blank. Click Register to create an application.
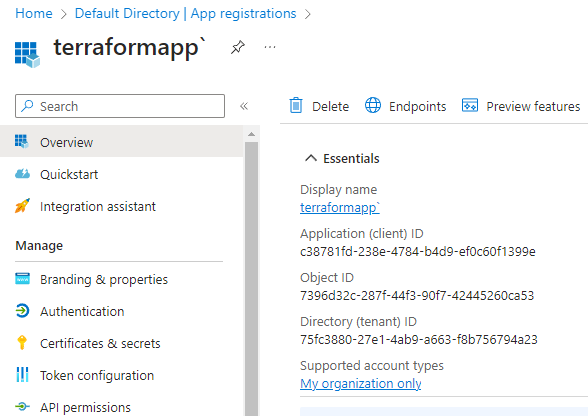
In the Overview section, copy the client id and tenant id. You also need to have a subscription id which you can find in your Active Directory or in your subscription resource in the portal.
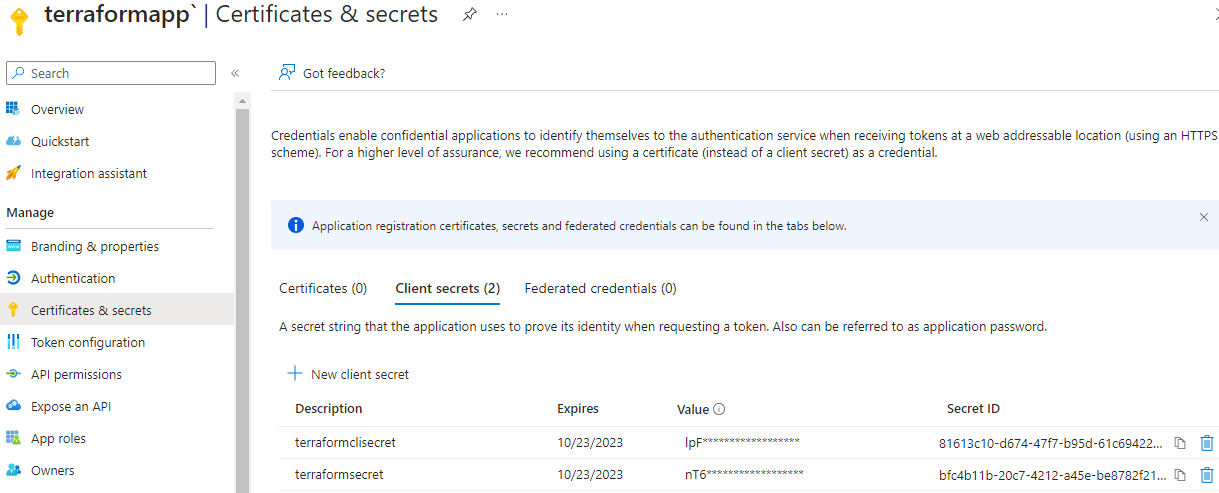
Click on Certificates & secrets, and then click + New client secret. Follow the instructions to create a new secret and once done, you should be presented with a secret which you should copy and save somewhere safe (preferably in Azure KeyVault) as this is the only time it will be visible to you.
In the end you should have these values with you:
Now if you try creating a new resource using Terraform, it will fail as the service principal does not have permissions to manage resources in your subscription. To grant permissions, go to Subscriptions in Azure portal and click Access control (IAM).
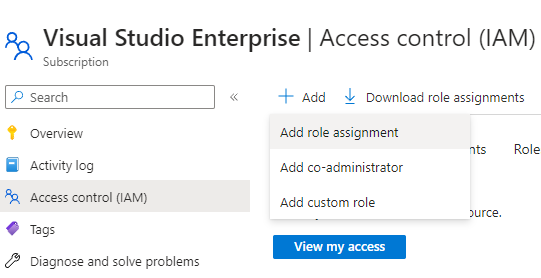
Click on Add role assignment and then click Privileged administrator roles.

You can ignore the warning shown at the bottom, we need this option for adding contributor access to the subscription we want to manage.
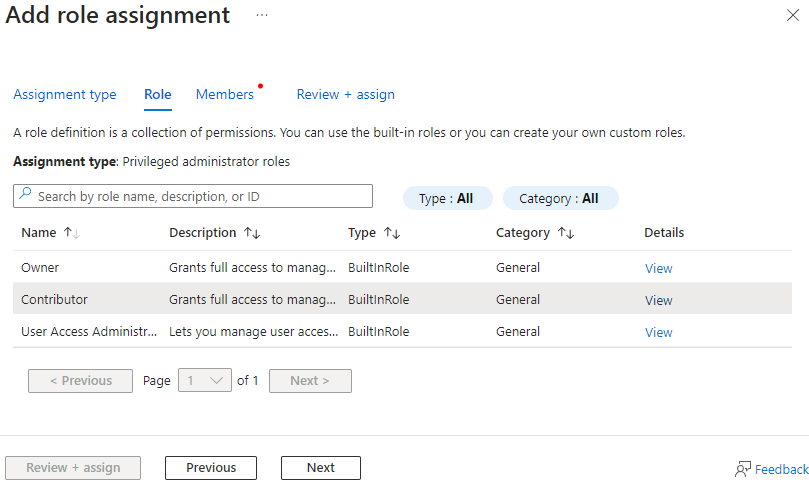
Select Contributor from the list and click Next.
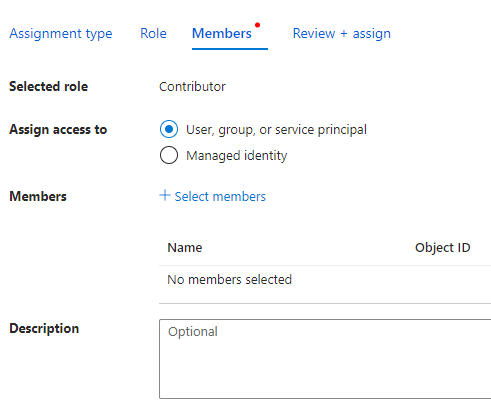
Select User, group or service principal and click + Select members.
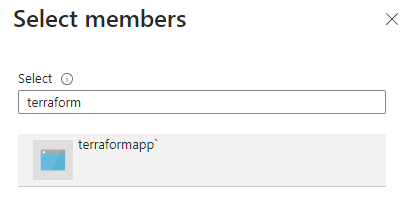
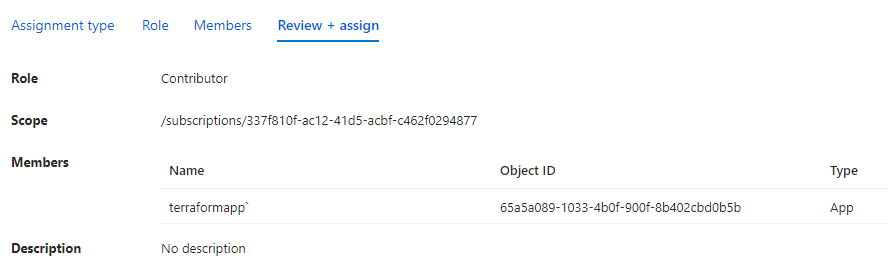
Search your application by name, select it and then click Select. Verify the details in the last step and click Review + assign.
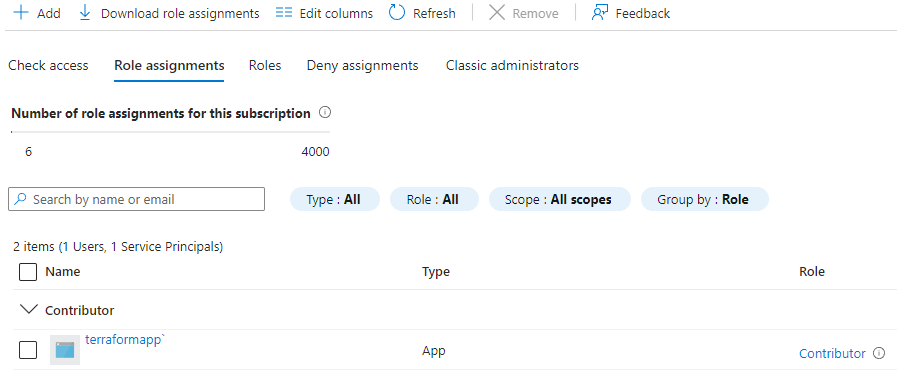
Back to the Access controls (IAM) blade, you can see the role assignment to the subscription.
Let’s see with a very basic example of getting this done programmatically. Setup a new go project and import these packages.
import (
    "fmt"
    "log"
    "os"

    "github.com/hashicorp/go-version"
    "github.com/hashicorp/hc-install/product"
    "github.com/hashicorp/hc-install/releases"
)
In the main function, add the below code:
os.Setenv("ARM_CLIENT_ID", "")
os.Setenv("ARM_CLIENT_SECRET", "")
os.Setenv("ARM_TENANT_ID", "")
os.Setenv("ARM_SUBSCRIPTION_ID", "")

//az login --service-principal -u CLIENT_ID -p CLIENT_SECRET --tenant TENANT_ID
cmd := exec.Command("az", "login", "--service-principal", "-u", os.Getenv("ARM_CLIENT_ID"), "-p", os.Getenv("ARM_CLIENT_SECRET"), "--tenant", os.Getenv("ARM_TENANT_ID"))
var stdoutBuf, stderrBuf bytes.Buffer
cmd.Stdout = io.MultiWriter(os.Stdout, &stdoutBuf)
cmd.Stderr = io.MultiWriter(os.Stderr, &stderrBuf)
err := cmd.Run()
if err != nil {
    log.Fatalf("cmd.Run() failed with %s\n", err)
}

outStr := string(stdoutBuf.Bytes())
fmt.Println(outStr)
The first thing we did was to set environment variables.
Name the environment variables as shown in the above example. These are the same names which are internally used by Terraform.
Normally I would use a service principal like this:
$ az login --service-principal -u CLIENT_ID -p CLIENT_SECRET --tenant TENANT_ID
As we are automating this process, we can use the exec.Command to execute this command with parameters like this:
cmd := exec.Command("az", "login", "--service-principal", "-u", os.Getenv("ARM_CLIENT_ID"), "-p", os.Getenv("ARM_CLIENT_SECRET"), "--tenant", os.Getenv("ARM_TENANT_ID"))
This will get the service principal and assign it to the terminal where this application will be running.
Moving ahead you can remove or comment out the above code and leave the environment variables as is in the code file.
As a next step you can also take the terraform binary from the environment variable and automate the execution just like above. But there is an efficient way of doing this and for that we must make slight changes to our code.
First, we need to check if terraform is installed on the machine or not. On my machine I have Terraform installed and added to the environment with the name terraform. In Go, I can get this path with the help of os.Getenv and pass in the name of the environment variable terraform.
If the path exists, then I will use that path and if not then I can install a specific version of Terraform. Here is the is the complete code for the above explanation:
package main

import (
    "context"
    "log"
    "os"

    "github.com/hashicorp/go-version"
    "github.com/hashicorp/hc-install/product"
    "github.com/hashicorp/hc-install/releases"
)

func main() {

    var execPath string
    var tfInstallDir string
    var err error
    tfBin := os.Getenv("terraform")

    if len(tfBin) > 0 {
        log.Printf("Found Terraform: %s", tfBin)
        execPath = filepath.Join(tfBin, "terraform.exe")
    } else {
        log.Print("Terraform not found....installing")
        installer := &releases.ExactVersion{
            Product: product.Terraform,
            Version: version.Must(version.NewVersion("1.4.6")),
        }

        wd, _ := os.Getwd()
        tfInstallDir = filepath.Join(wd, "tf")
        if _, err := os.Stat(tfInstallDir); err != nil {
            log.Printf("Installation directory not found...creating")
            if err = os.MkdirAll(tfInstallDir, os.ModePerm); err != nil {
                log.Fatalf("ERROR: Cannot create \"%s\" directory - %v", tfInstallDir, err.Error())
                panic(err)
            }

            installer.InstallDir = tfInstallDir

            log.Printf("Installing version: %s", installer.Version.String())

            execPath, err = installer.Install(context.Background())
            if err != nil {
                log.Fatalf("Error installing Terraform: %s", err)
            }

            execPath = filepath.Join(installer.InstallDir, "terraform.exe")
            log.Printf("Installed Terraform %s at %s", installer.Version.String(), execPath)
        } else {
            execPath = filepath.Join(tfInstallDir, "terraform.exe")
            log.Printf("Terraform %s found at %s", installer.Version.String(), execPath)
        }
    }
}
The above program first looks for the terraform environment variable and tries to get the value for it. If the value exists, execPath variable will hold its value. If not meaning that Terraform is not installed on this machine and requires installation. The two packages that will help us installing the right version of Terraform are:
We first prepare the installer by providing the details of the product we want to install, in our case, it is Terraform. You can provide a specific version based on your requirements. If you want to install any specific version like 1.0.6 etc. You can provide the version number and it will be installed.
The installer.Install function will take in the context which will run in the background and perform the installation for us. Once the installation is completed, you can see the path of the Terraform binary.
Note that if I have not provided an installation path or a directory, the installation will be done in a temp location of your machine. If you don’t want the installation to be done in a temporary location and also want to speed up the execution, then set the InstallDir property to set the path for installation.
Check the below code for
InstallDirimplementation.
Next, we set up the working directory where our Terraform code is. We need to import a new package called tfexec:
"github.com/hashicorp/terraform-exec/tfexec"
and the code:
workingDir := "iac"
tf, err := tfexec.NewTerraform(workingDir, execPath)
if err != nil {
  log.Fatalf("Error running NewTerraform: %s", err)
}
The NewTerrafrom function takes in two parameters. First is the working directory where you have kept your .tf files and the second one is the execPath, which is the executable path of the Terraform binary.
After this we can perform terraform init and apply like this:
log.Print("Start executing TF Init")
err = tf.Init(context.Background(), tfexec.Upgrade(true))
if err != nil {
    log.Fatalf("Error running Init: %s", err)
}

log.Print("Finished running TF Init")

log.Print("Start running TF Apply")
err = tf.Apply(context.Background())
if err != nil {
    log.Fatalf("Error running Apply: %s", err)
}

log.Print("Finished running TF Apply")
Both init and apply code are simple to understand. The last one is the show command. If you have worked with terraform cli, you also want to show the output after terraform apply has been successful. The output variables defined in your .tf files will return values like IP address of the virtual machine or the DNS name which you can save or use somewhere else.
These are the contents of my output.tf file:
output "public_ip_address" {
  value = azurerm_linux_virtual_machine.popcorndbvm.public_ip_address
}

output "tls_private_key" {
  value     = tls_private_key.popcornssh.private_key_openssh
  sensitive = true
}
We can also check if the output is marked as sensitive or not. You can see here that I have marked tls_private_key as sensitive. When you traverse the output variables, you can check the Sensitive property and prevent the value to be displayed in your terminal. Below is the code that does the same thing:
state, err := tf.Show(context.Background())
if err != nil {
    log.Fatalf("Error running Show: %s", err)
}

for s, i := range state.Values.Outputs {
    val := i.Value
    if s == "tls_private_key" && i.Sensitive {
        data := val.(string)
        err := ioutil.WriteFile("propcornvm_key.key", []byte(data), 0)
        if err != nil {
            log.Fatalf("Cannot save private key to the local machine. - %s", err.Error())
        } else {
            fmt.Printf("Private Key saved: %s\n", "propcornvm_key.key")
        }
    } else {
        fmt.Printf("%s : %s", s, val)
        fmt.Println()
    }
}
The state variable is a pointer to *tfjson.State and once it runs successfully the output will be stored in a map[string]*tfjson.StateOutput, which we can iterate over to get the values of the output variables.
NOTE: You can use my terraform files to create a web app, app service plan, Linux virtual machine etc. You can view these files here.
Here is the complete code. You need to update the environment variables and replace them with the variables you have obtained from Azure portal. Set workingDir variable with the name of the path where your tf files are.
package main

import (
    "context"
    "fmt"
    "io/ioutil"
    "log"
    "os"
    "path/filepath"

    "github.com/hashicorp/go-version"
    "github.com/hashicorp/hc-install/product"
    "github.com/hashicorp/hc-install/releases"
    "github.com/hashicorp/terraform-exec/tfexec"
)

func main() {

    // Update these environment variables with yours.
    os.Setenv("ARM_CLIENT_ID", "")
    os.Setenv("ARM_CLIENT_SECRET", "")
    os.Setenv("ARM_TENANT_ID", "")
    os.Setenv("ARM_SUBSCRIPTION_ID", "")

    //az login --service-principal -u CLIENT_ID -p CLIENT_SECRET --tenant TENANT_ID
    // cmd := exec.Command("az", "login", "--service-principal", "-u", os.Getenv("ARM_CLIENT_ID"), "-p", os.Getenv("ARM_CLIENT_SECRET"), "--tenant", os.Getenv("ARM_TENANT_ID"))
    // var stdoutBuf, stderrBuf bytes.Buffer
    // cmd.Stdout = io.MultiWriter(os.Stdout, &stdoutBuf)
    // cmd.Stderr = io.MultiWriter(os.Stderr, &stderrBuf)
    // err := cmd.Run()
    // if err != nil {
    //  log.Fatalf("cmd.Run() failed with %s\n", err)
    // }

    // outStr := string(stdoutBuf.Bytes())
    // fmt.Println(outStr)

    var execPath string
    var tfInstallDir string
    var err error
    tfBin := os.Getenv("terraform1")

    if len(tfBin) > 0 {
        log.Printf("Found Terraform: %s", tfBin)
        execPath = filepath.Join(tfBin, "terraform.exe")
    } else {
        log.Print("Terraform not found....installing")
        installer := &releases.ExactVersion{
            Product: product.Terraform,
            Version: version.Must(version.NewVersion("1.4.6")),
        }

        wd, _ := os.Getwd()
        tfInstallDir = filepath.Join(wd, "tf")
        if _, err := os.Stat(tfInstallDir); err != nil {
            log.Printf("Installation directory not found...creating")
            if err = os.MkdirAll(tfInstallDir, os.ModePerm); err != nil {
                log.Fatalf("ERROR: Cannot create \"%s\" directory - %v", tfInstallDir, err.Error())
                panic(err)
            }

            installer.InstallDir = tfInstallDir

            log.Printf("Installing version: %s", installer.Version.String())

            execPath, err = installer.Install(context.Background())
            if err != nil {
                log.Fatalf("Error installing Terraform: %s", err)
            }

            execPath = filepath.Join(installer.InstallDir, "terraform.exe")
            log.Printf("Installed Terraform %s at %s", installer.Version.String(), execPath)
        } else {
            execPath = filepath.Join(tfInstallDir, "terraform.exe")
            log.Printf("Terraform %s found at %s", installer.Version.String(), execPath)
        }
    }

    workingDir := "iac"
    tf, err := tfexec.NewTerraform(workingDir, execPath)
    if err != nil {
        log.Fatalf("Error running NewTerraform: %s", err)
    }

    log.Print("Start executing TF Init")
    err = tf.Init(context.Background(), tfexec.Upgrade(true))
    if err != nil {
        log.Fatalf("Error running Init: %s", err)
    }

    log.Print("Finished running TF Init")

    log.Print("Start running TF Apply")
    err = tf.Apply(context.Background())
    if err != nil {
        log.Fatalf("Error running Apply: %s", err)
    }

    log.Print("Finished running TF Apply")

    state, err := tf.Show(context.Background())
    if err != nil {
        log.Fatalf("Error running Show: %s", err)
    }

    for s, i := range state.Values.Outputs {
        val := i.Value
        if s == "tls_private_key" && i.Sensitive {
            data := val.(string)
            err := ioutil.WriteFile("propcornvm_key.key", []byte(data), 0)
            if err != nil {
                log.Fatalf("Cannot save private key to the local machine. - %s", err.Error())
            } else {
                fmt.Printf("Private Key saved: %s\n", "propcornvm_key.key")
            }
        } else {
            fmt.Printf("%s : %s", s, val)
            fmt.Println()
        }
    }
}
terraform-exec module is used to construct the terraform commands. Take a look at its repository.
Before you plan to use this module in your production environment, consider the below excerpt from the repository readme file:
While terraform-exec is already widely used, please note that this module is not yet at v1.0.0, and that therefore breaking changes may occur in minor releases.
Here is the output of the above example, when I run it with my Azure service principal.
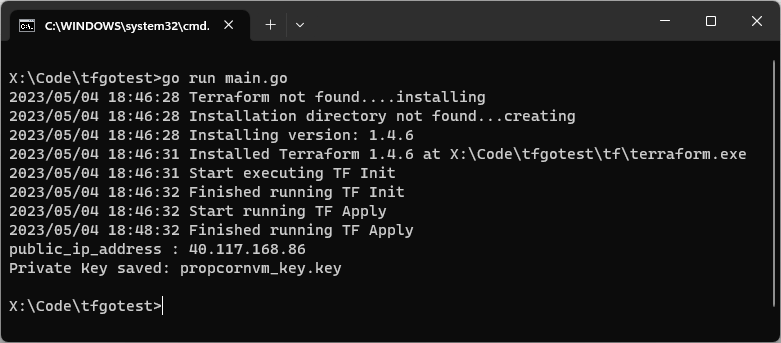
You can see 1 output variable public_ip_address and because we have marked the other output variable as sensitive, it is not shown here in the terminal, instead its output is stored in a file named popcornvm_key.key.
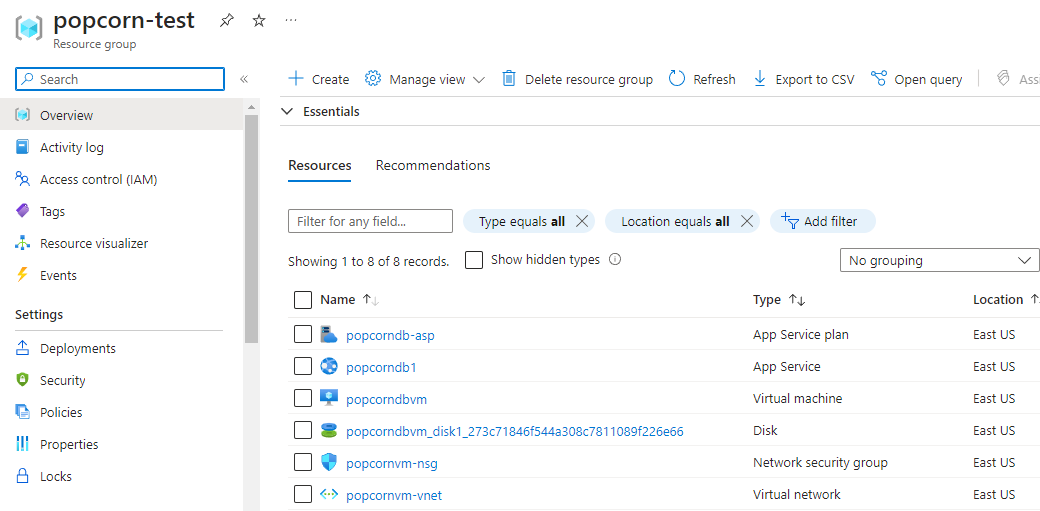
We see all our resources are successfully created in Azure portal.
Docker Hub or GitHub Container Registry also known as ghcr.io is a go to platform for most of the OSS developers and teams to host their Docker images. These platforms are free for open-source software, but you might need to upgrade from the free plan to use a paid plan so that your docker image is only available for your infrastructure use and not for public use.
Azure provides Container Registry service where you can host your Docker images with ease and use the same docker pull and run command to pull and run the container on your machine, or you can also use these images to create containers when provisioning a new Web App which uses containers or with Azure Kubernetes Service (AKS).
Let’s dive into how to create a simple Docker image and push it to Azure Container Registry (ACR). But before we get started, we need few things:
Go to Azure portal and click on Create a resource and type container registry. Follow the steps and you’re done.

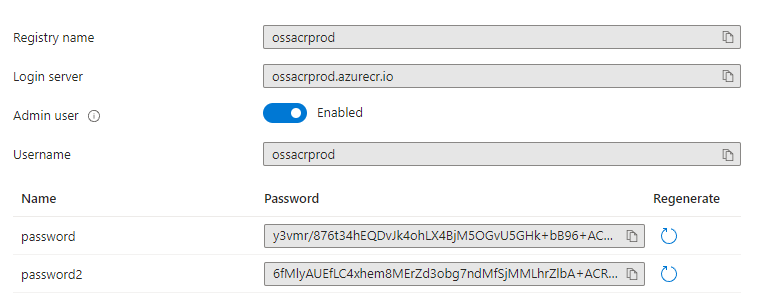
After the resource is created, we have to do change a few configurations to get it to work. Go to Access keys and enable the Admin user. You can now see the Username and 2 passwords which you can use to login to ACR via docker login command.
I have a small API application which I wrote in Go. It lets you fetch the lyrics of your favorite song. Here is the app in action.

To see it in action on your local machine, clone the repo from GitHub and copy-paste this URL in your browser. http://localhost:8989/lyrics?artist=eminem&song=rap%20god
To create a Docker image, we first have to create a file called Dockerfile and then add the below docker commands.
# syntax=docker/dockerfile:1

FROM golang:1.20

# Set destination for COPY
WORKDIR /app

# Download Go modules
COPY go.mod go.sum ./

RUN go mod download

COPY . ./

# Build
RUN go build -o /goazl

EXPOSE 8989

# Run
CMD ["/goazl"]
Save this file and execute the command below in your terminal:
$ docker build –t goazl-default .
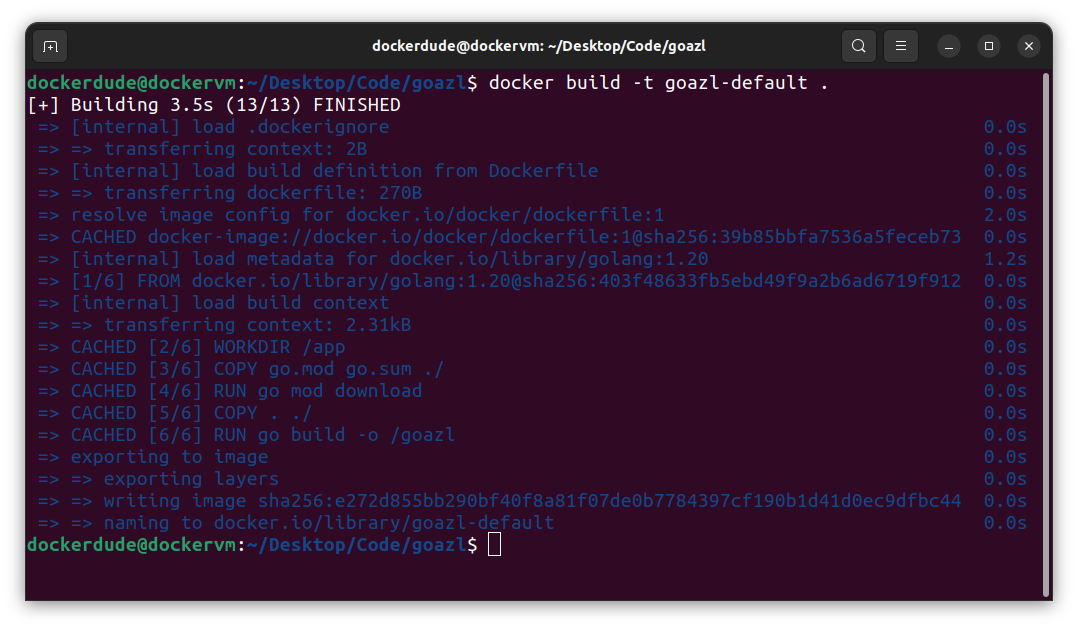
The above command will take some time to execute and once it is completed successfully, you can execute another docker command to view the image it has created.
$ docker images
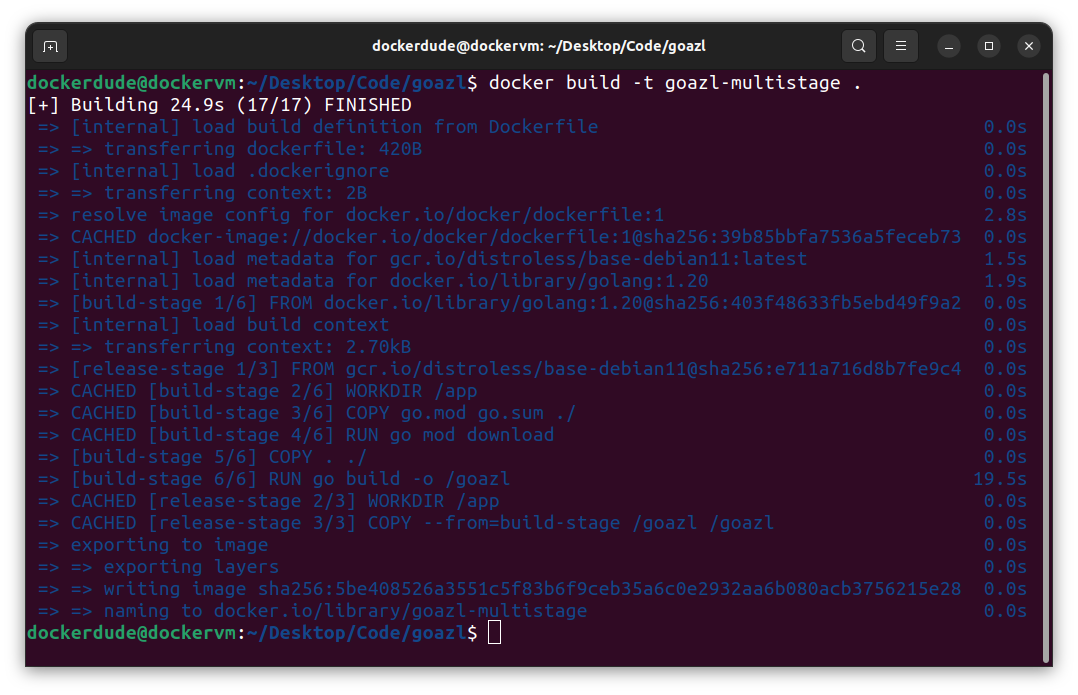
You should always create a multi-stage docker image for your applications as it comes with some important benefits. You can read more about those benefits here.
Here is the multi-stage Docker file which you should use:
# syntax=docker/dockerfile:1

FROM golang:1.20 AS build-stage

# Set destination for COPY
WORKDIR /app

# Download Go modules
COPY go.mod go.sum ./
RUN go mod download

COPY . ./

# Build
RUN go build -o /goazl

FROM gcr.io/distroless/base-debian11 AS release-stage

WORKDIR /app

COPY --from=build-stage /goazl /goazl

EXPOSE 8989

# Run
ENTRYPOINT ["/goazl"]
This time use this command to create another multi-stage docker image.
$ docker build -t goazl-multistage .
You can see the difference in size of these images.
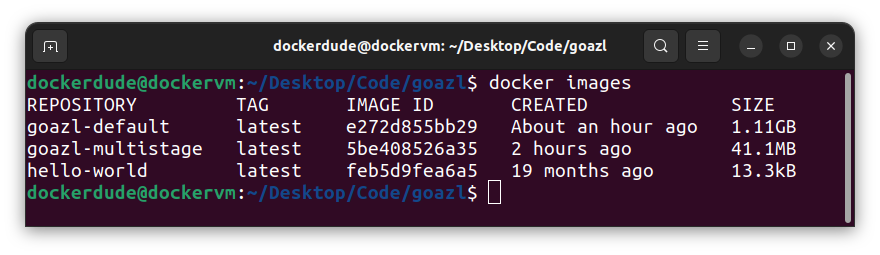
You can see in the above screenshot that the image with default in the name cost me 1.11GB of disk space as it includes all the go tool chain. This also poses a security risk. On the other hand you can look at the size of the multistage docker image which is only 41.1MB.
Now we have the image ready to push to ACR. Let’s configure Docker command line to use our Azure Container Registry.
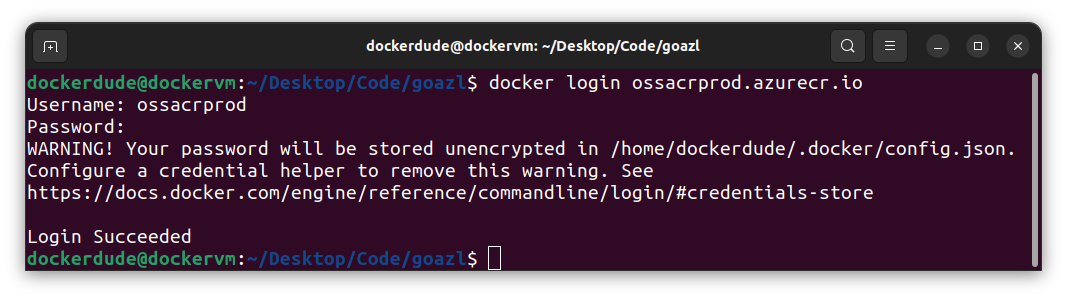
We will use the docker login command to login to the Container Registry.
$ docker login ossacrprod.azurecr.io
After this, the prompt will ask for username and password, which you can get from the Azure Portal. If all goes well then you should see something like this:
With login done, we can proceed to tag our image and push it to ACR. For that, first list all the images by executing docker images command.
Tag the image with the following command:
$ docker tag goazl-multistage ossacrprod.azurecr.io/goazl:1.0
I sometimes prefer using the registry name in front of my image name, but you can also use it without it like so:
$ docker tag goazl-multistage goazl:1.0
Notice that I am using the multi-stage image as it has less storage footprint than the default image. This also lets me save some cost in terms of storage in Azure and is also quicker to pull the image from the registry. Multi-stage images let you create secure images, and it is a recommended way to create docker images.
The final step is to push the image to ACR using the docker push command:
$ docker push ossacrprod.azurecr.io/goazl:1.0
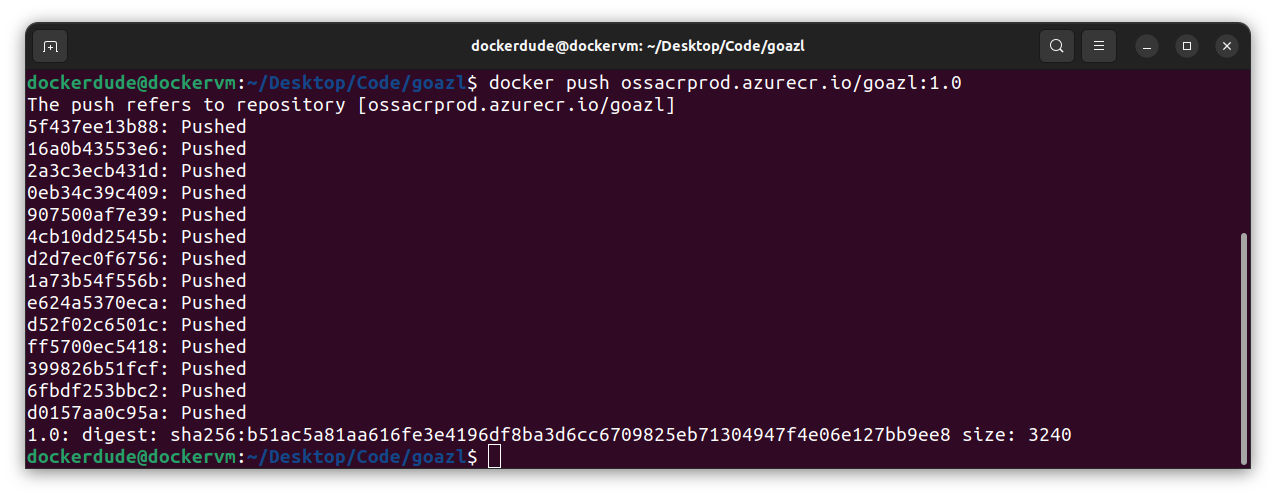
You can also check your docker image in Azure Container Registry using Azure portal:
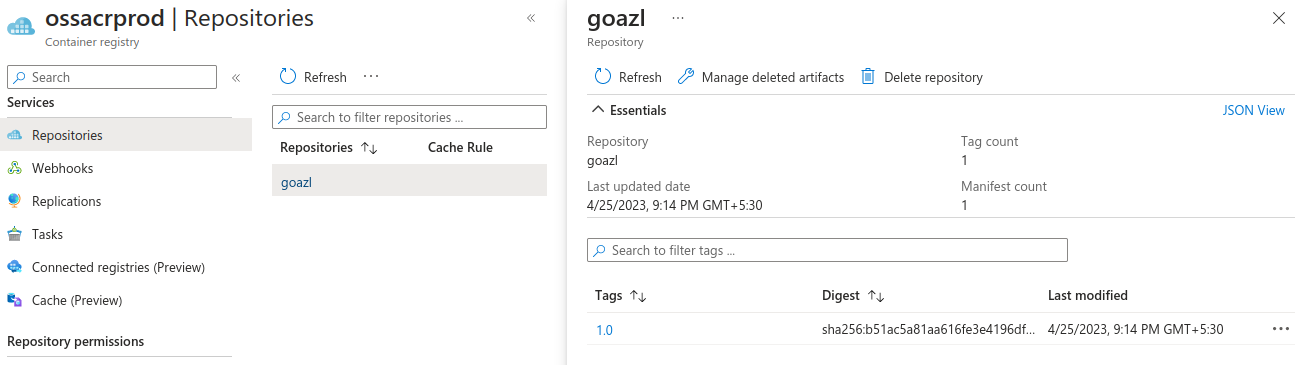
You can also pull this image just like any other docker image you can pull from docker hub.
$ docker pull ossacrprod.azurecr.io/goazl:1.0
To make things more convenient, you can use Azure CLI to list images in your ACR. Install az cli and get started by login in using your Azure credentials. After installation is done, open terminal and issue the below command:
$ az login
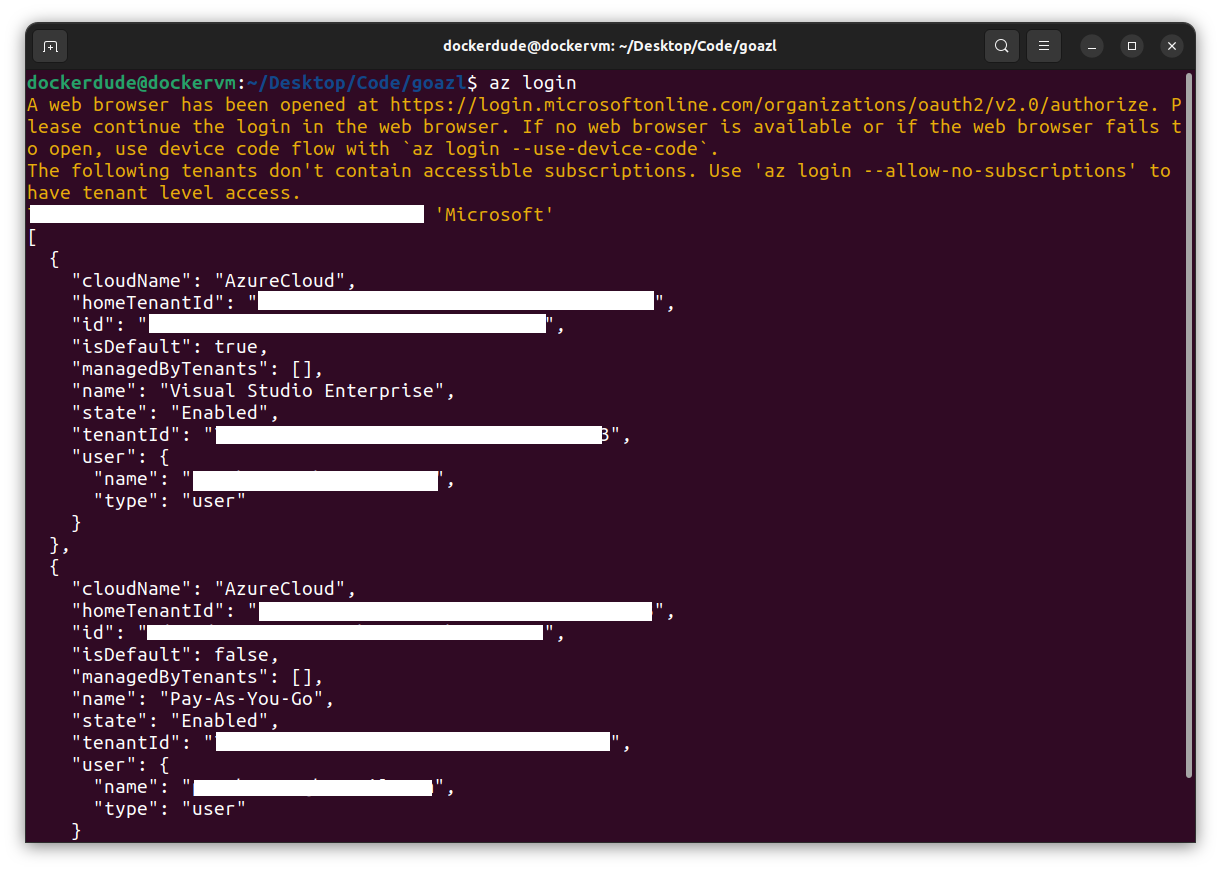
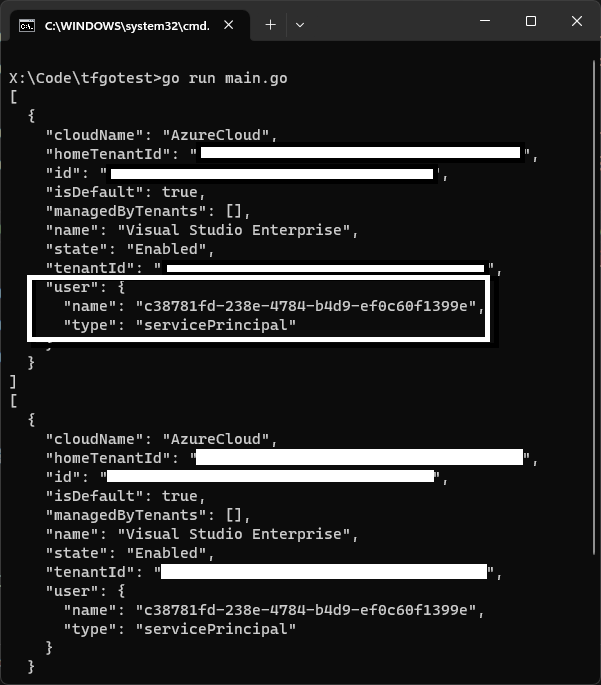
This command will open up your default web browser and ask for your Azure credentials. After you have successfully authenticated yourself, you can close the page. The terminal will display the list of the subscriptions you have. Depending under which subscription you have created your Azure Container Registry you should select that subscription. Here are some of the az commands which will help you select your subscription.
Note that these steps are only needed if you have multiple Azure subscriptions. If you have one subscription, then you can skip these steps.
To show which subscription is selected:
$ az account show

If you want to see all the subscription you have/own:
$ az account list
If you want to change the default subscription used by az cli to be different than that of the default one, then use the below command to explicitly use that subscription:
$ az account set --subscription < subscription id >
Change <subscription id> to your subscription id you want to use. This is the id field in the az account list command output.
After this you can verify the set subscription with the command:
$ az account show
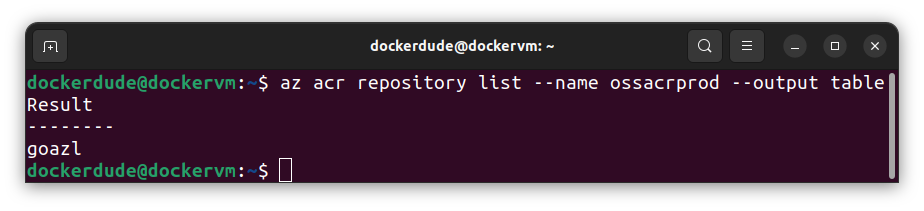
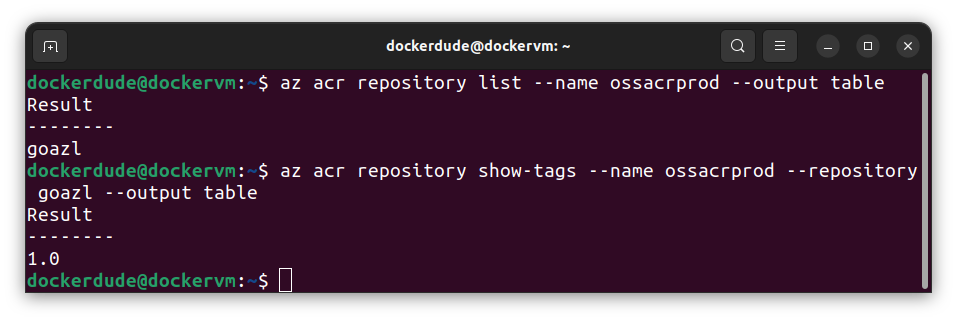
Once az cli is setup properly, we can now use it to list images in ACR.
To list images in the container registry:
$ az acr repository list --name ossacrprod --output table
The above command will query the container registry and return the list of all repositories. That is what acr repository list is doing here. It might be possible that you have multiple ACR in your subscription, therefore, --name flag is used to specify the name of the registry. The --output flag with value table is used to output the results in table format.
To view the tags of the image in your container registry:
$ az acr repository show-tags --name ossacrprod --repository goazl --output table
This command is almost the same as the previous command with slight changes to it. The initial option is set to acr repository show-tags instead of list as we want to see the tags for a given image or repository. Then we set --repository flag with the name of the repository (goazl) for which we want to see all the tags.
All images in ACR are referred as repositories.
If you have a static website, blog or a react application, here is how you can host them for cheap with Azure Blob Storage. This article focuses on how you can configure Azure Blob Storage to host your static website or react application.
Creating a react application is simple with create-react-app and then build the optimized output of the application by running npm run build command. This will publish the optimized version of the react app in the build folder.
IMPORTANT: If you are using Next.JS or any other framework which require server-side rendering then hosting your application with Azure Blob Storage will not work as server-side rendering demands a web server to deliver the content to the client.
Once the build is completed successfully, it is time to configure Azure Blob Storage to host the static website. Go to portal.azure.com and create a new resource by clicking Create a resource and then search for Blob Storage.
Select the resource offering which is provided by Microsoft. Click on Create and follow the instructions to create a new Blob Storage Account.
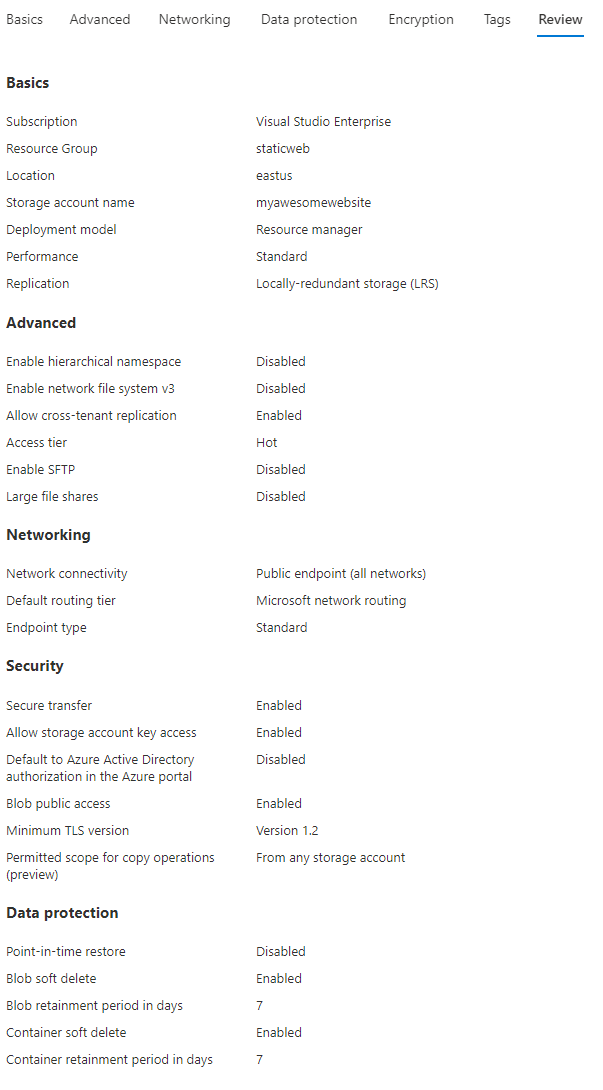
In the Basics tab, fill in the details like shown below.
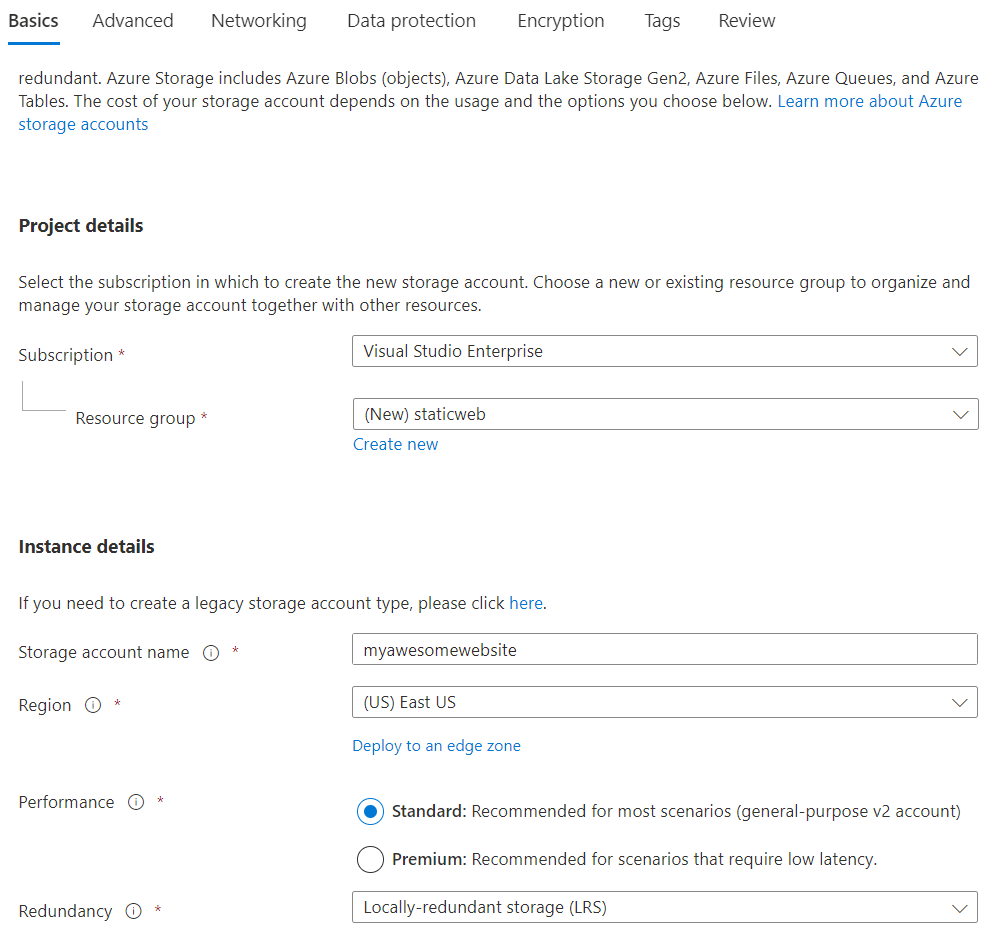
I have created a new resource group and named it staticweb. You can name it anything you want. The next is Storage account name which you can set what you want but the name you choose here should be unique across Azure. Region is the place where your resources/storage account will get created. You can select the region which is close to your geographic location for lower latencies. If your website, application or blog is very critical, then you can also opt for Geo-zone-redundant-storage which is for critical business applications. As our use case is very simple and our application is not critical, we can select Locally-redundant storage. For Performance, you can select Standard, but if you want lower latencies then you can select Premium.
Check pricing with Azure Pricing Calculator before you proceed with any service in Azure. This will give you an idea of how much money you have to spend with these settings over a period of a month.
Let’s keep all other settings as they are and click Create to provision a new Storage Account.
After the storage account is created, under Data management, select Static website.
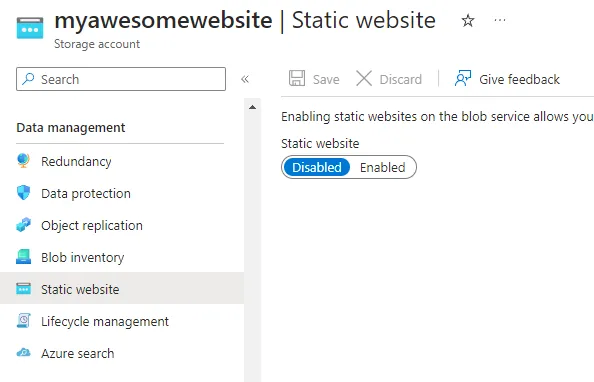
Static websites are disabled by default. Click on Enabled and you will see two fields are now visible asking for the index document name and error document path.
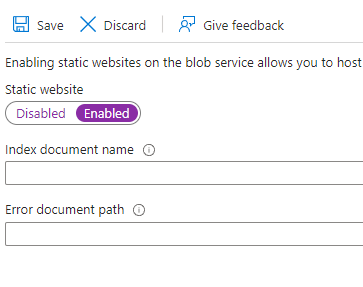
Depending on the landing, default or index page of your application, you can enter the name of the document here. In my case where I am hosting a react application, the index document name is index.html and error document can be 404.html or something else. I don’t have an error document, so I am leaving it blank.
Click Save to save the setting. You will now have the URL of your static website along with the name of the container where the contents of your static app should be uploaded.
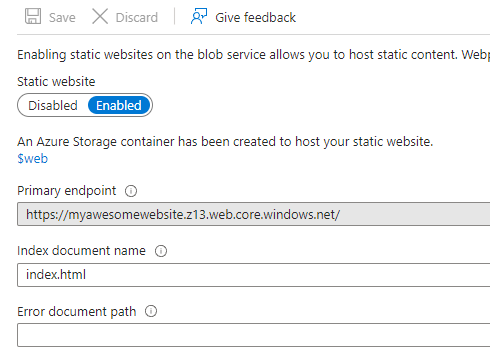
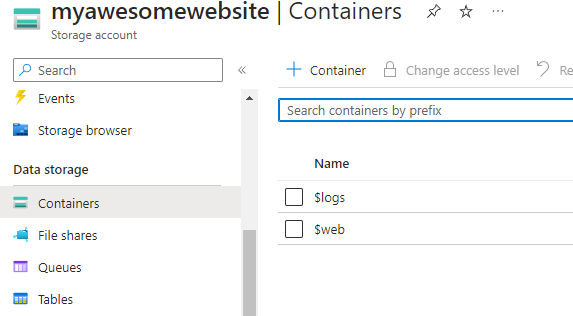
Notice the container name is $web and the primary endpoint is https://myawesomewebsite.z13.web.core.windows.net/.
You can also navigate to this $web container by clicking Containers under Data storage section.
Uploading multiple files directly from the portal is a tedious task and takes a lot of time. I would recommend making use of an open-source tool called Azure Storage Explorer. Download this for your operating system and install it.
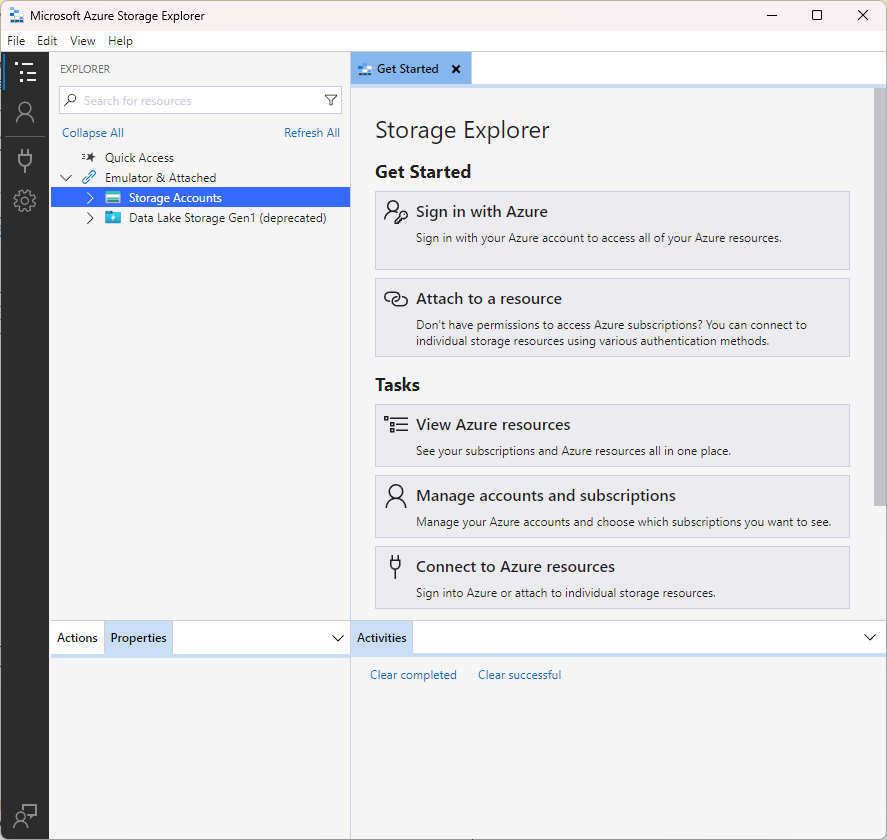
There are a few ways to connect to the storage account in Storage Explorer.
Click on Attach a resource on the Get Started page or right click Storage Account and select Connect to Azure storage…
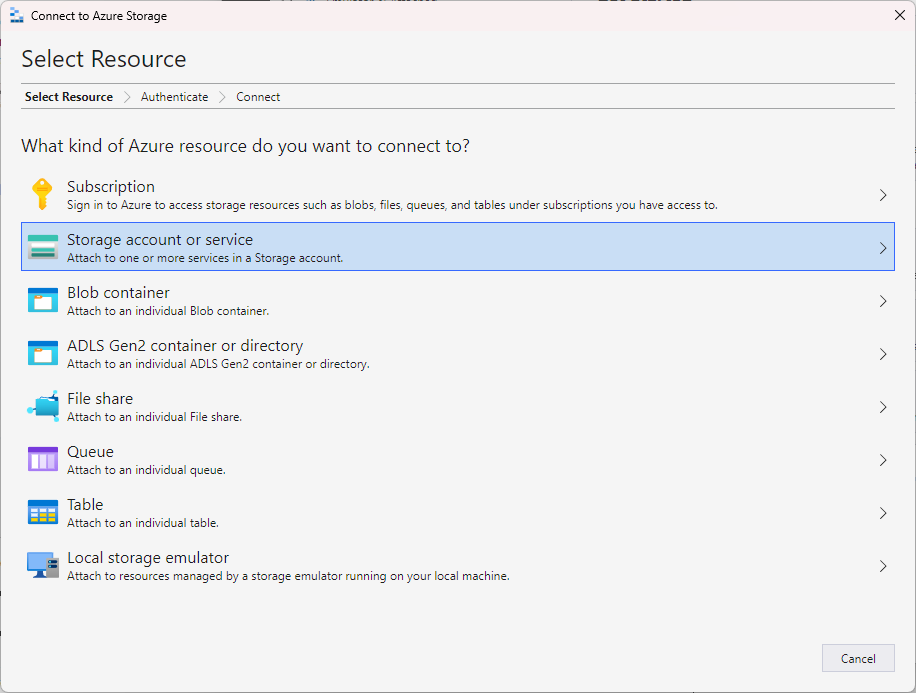
You can also select Blob container and then generate the SAS token to connect to a container. I am connecting my storage account with storage account connection string. You can get the connection string from the Azure Portal.
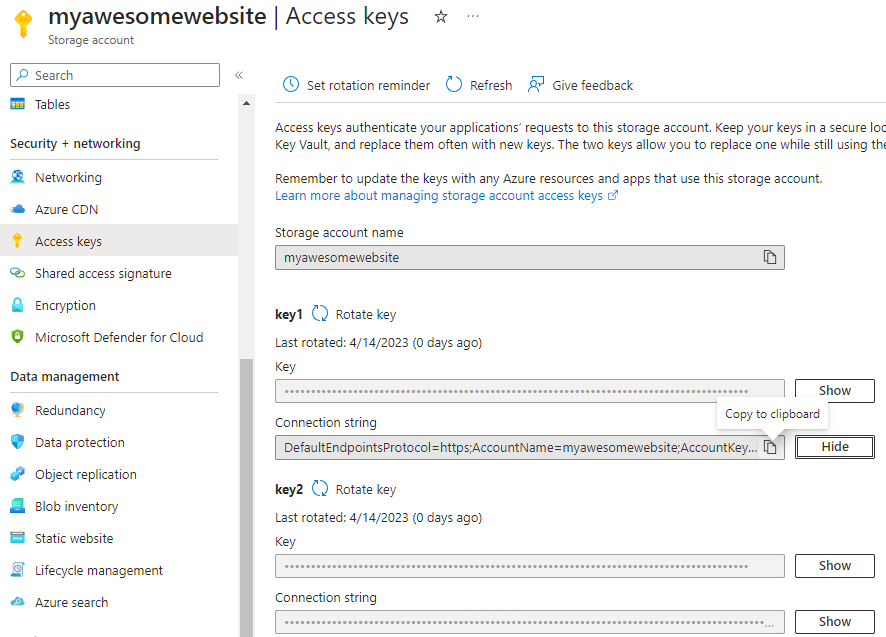
Under Security + Networking, click Access Keys and then click on Show button for Key1 > Connection string. Click Copy to clipboard icon to copy the connection string.
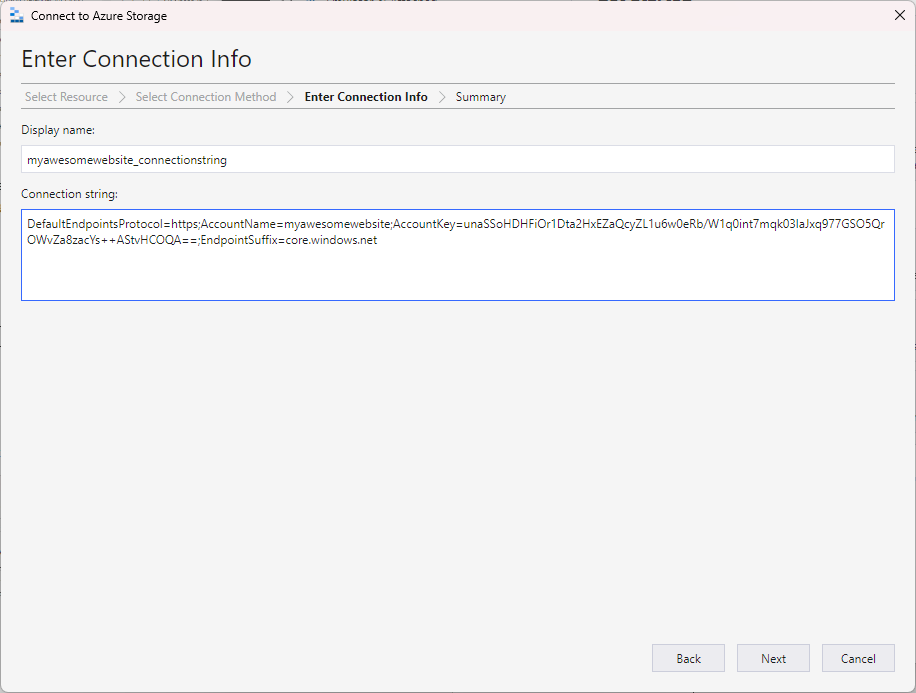
Back in the Storage Explorer, click on Connection string (Key or SAS).
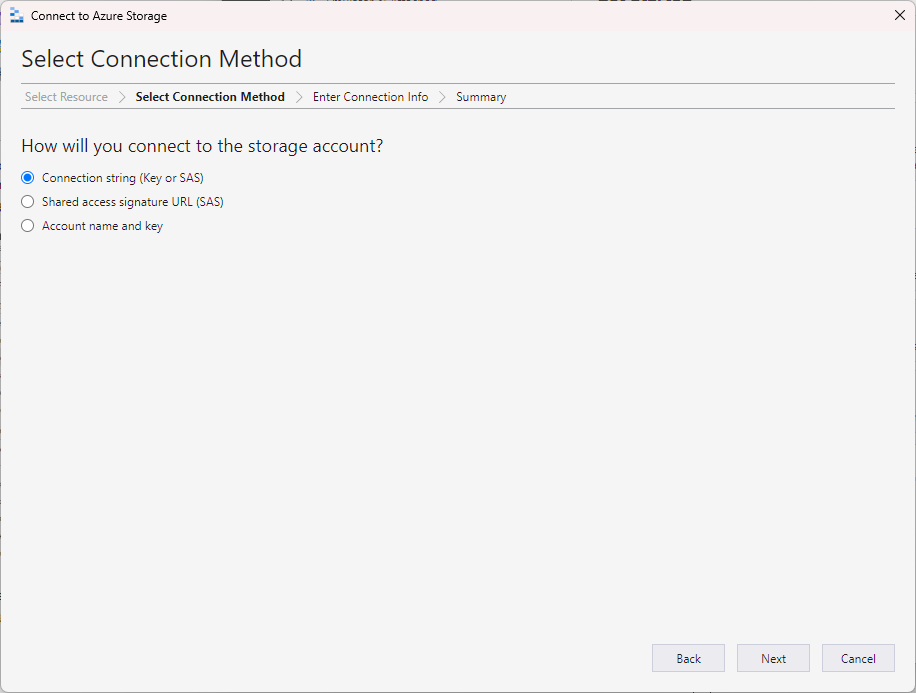
Enter the connection information and click Next.
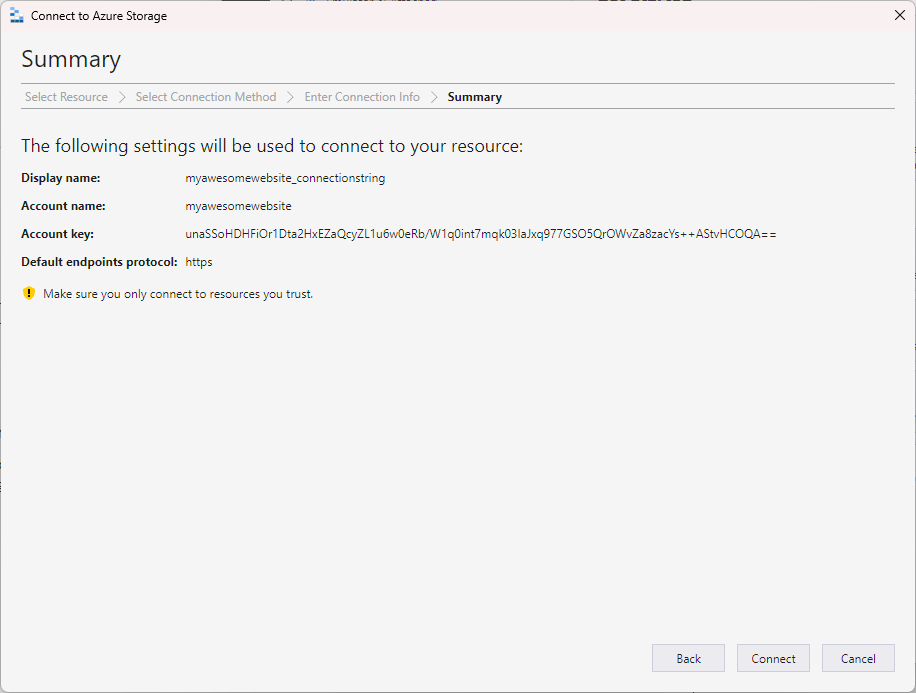
Review the final details and click on Connect to connect to the storage account.
After the connection is succeeded, you should see the list of all the containers in the storage account.
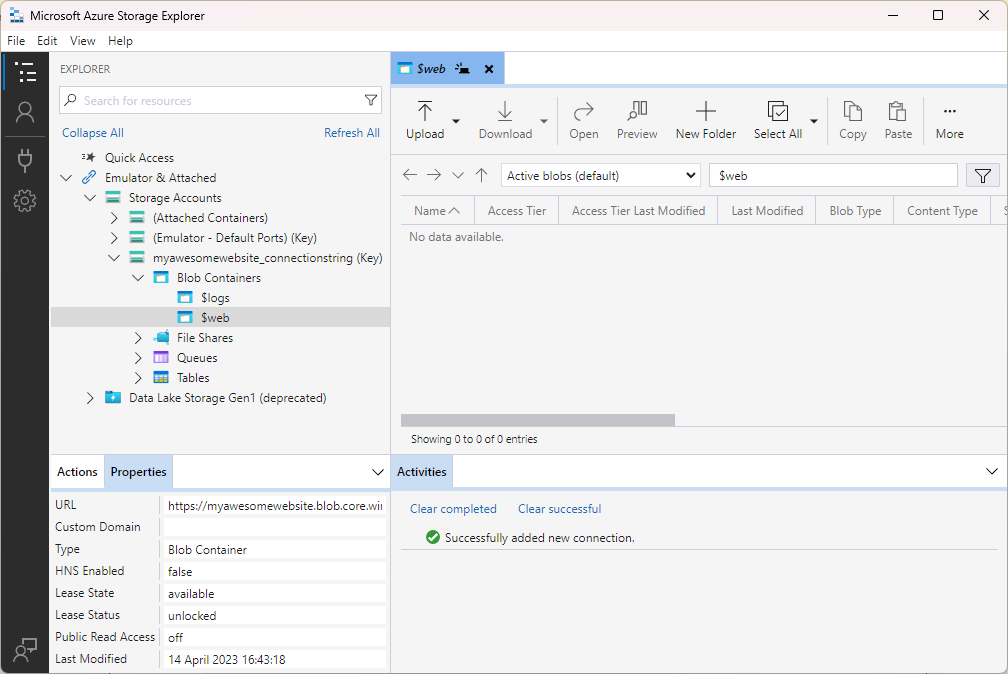
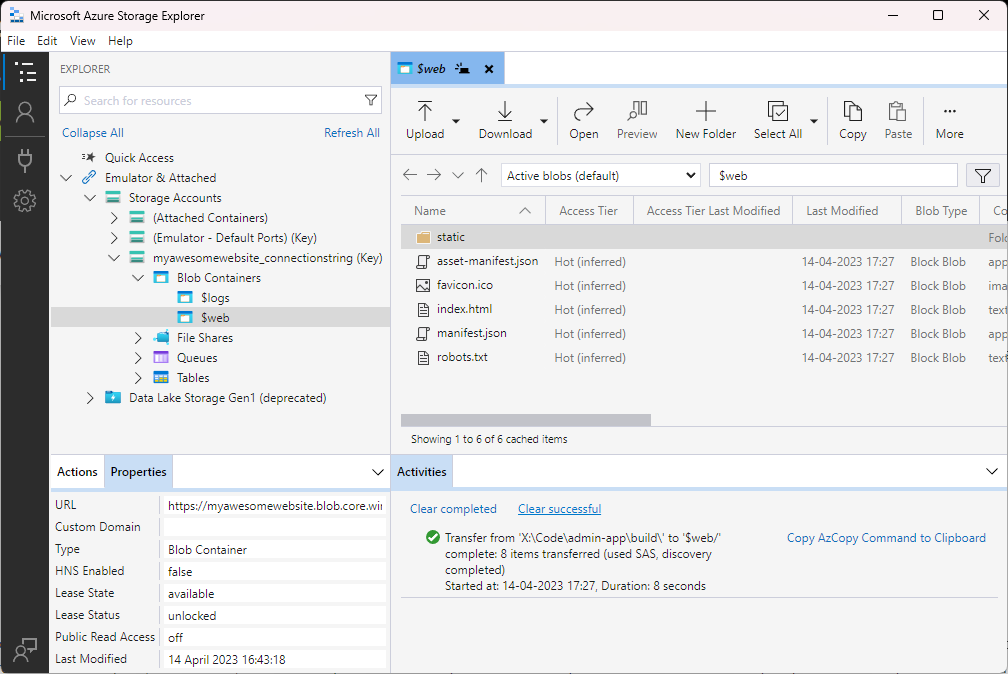
Select the $web container and start uploading the files of your static web app.
That’s all!!
Let’s check if our react application is running through static website blob storage url or not.
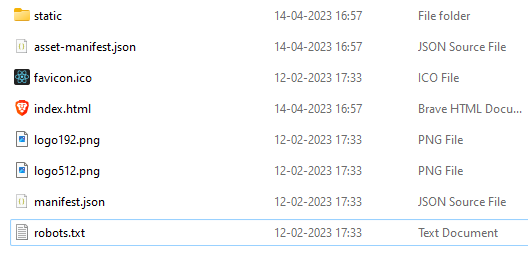
I built my react application by using the npm run build command and these are the files which I am going to upload to the $web container.

Hooray!! Our react application is successfully hosted and served from Azure Blob Storage.